Rotate and Flip Images Online: Complete Orientation Guide
Complete guide to rotating and flipping images online. Fix photo orientation, mirror images, adjust angles, batch-process.
My grandmother regularly sends me scanned photographs from the 1970s and 1980s. These are treasured family memories that I love receiving. But approximately half of them arrive sideways, upside down, or at some random angle. She is not trying to frustrate me. She genuinely cannot figure out why her scanner does not always get the orientation correct, and she does not have any software installed on her computer to fix the problem after the scan is complete.
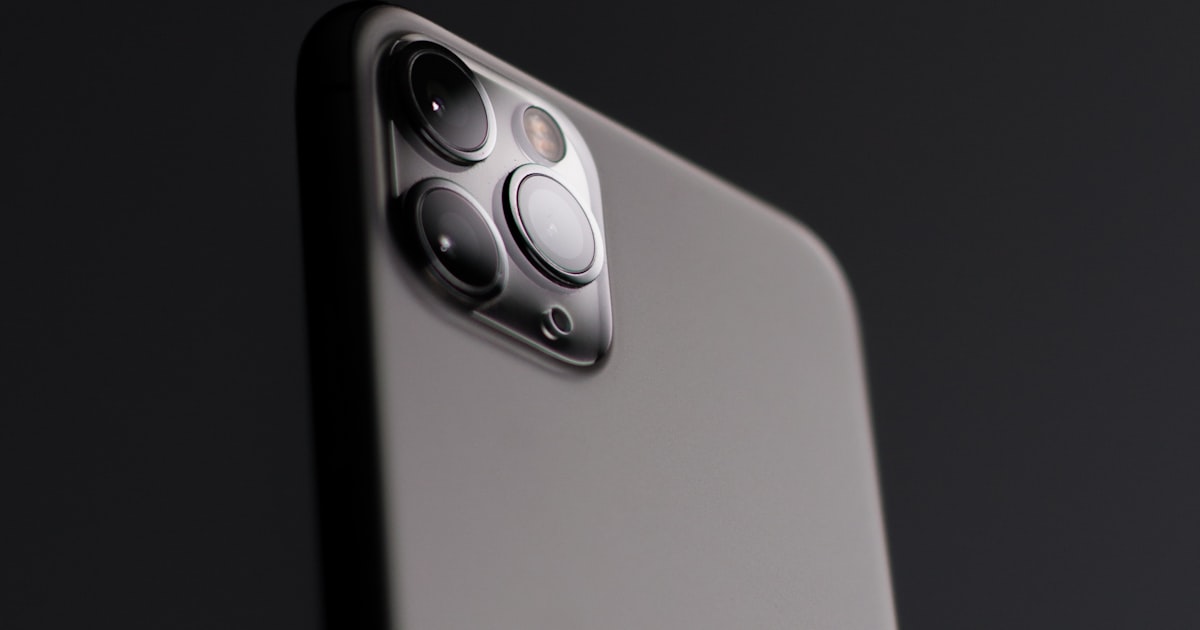
Image orientation problems are incredibly common and affect virtually everyone who works with digital images from multiple sources. Your phone camera captures orientation information in EXIF metadata that is embedded in the image file. But this metadata is interpreted differently by different devices, operating systems, and software applications. A photo that looks perfect when viewed on your iPhone may appear sideways when you upload it to a website, share it with someone using Android, or open it in a different photo viewer on your computer.
Fixing image orientation is one of the most basic and most useful digital skills anyone can learn. With the right online tool, you can rotate, flip, or straighten any image in seconds without installing software, creating accounts, or learning complex editing applications.
Understanding EXIF Orientation
EXIF Orientation Explained: Modern cameras and phones store a small piece of metadata called an orientation tag inside every image file. This tag instructs display software whether to show the image normally, rotated 90 degrees, rotated 180 degrees, or mirrored horizontally. The problem is that different software applications handle this tag inconsistently. Permanent pixel-level rotation guarantees consistent display across every device and platform.
Rotation vs Flipping
Rotation turns the image around its center point. 90 degrees changes portrait to landscape. 180 degrees flips upside down. Custom angles (1-10 degrees) straighten crooked photos. Flipping reverses the image along an axis. Horizontal flip mirrors left-right. Vertical flip swaps top-bottom.
The Complete Orientation Fix Workflow
Identify the Problem
Determine whether the image needs 90-degree rotation, straightening with a custom angle, or horizontal/vertical flipping. Each problem has a different solution.
Apply the Correct Transformation
Use rotate buttons for 90-degree turns, a straightening slider for crooked photos, and flip options for mirrored images.
Use a Grid for Precision
Activate the grid overlay and align it with a horizontal element in your photo for perfectly straight results.
Check Image Edges
Custom rotation creates empty triangular gaps. Crop them or fill with a background color.
Preview at Full Size
Check that text is readable, faces look natural, and the composition still works.
Save Correctly
JPEG at quality 85 for photos, PNG for lossless. Avoid repeated saving of JPEG files to prevent generational quality loss.
Common Orientation Scenarios
Sideways Phone Photos: The most common issue. Upload and apply 90-degree rotation. Crooked Scanned Documents: Use custom rotation of 1-5 degrees with grid alignment. Mirrored Selfies: Front cameras often produce mirrored images. Use horizontal flip to correct.
Frequently Asked Questions
Does rotating reduce quality?
90/180/270 rotations are lossless. Custom angles require interpolation, which may introduce slight softness.
Why correct on phone but wrong on computer?
Your phone reads EXIF orientation data. Your computer may ignore it.
How to straighten a crooked photo?
Use a straightening tool with a grid overlay aligned to a horizontal or vertical reference.
Flip vs rotate 180 difference?
Flip mirrors left-right (text reads backwards). Rotate 180 turns upside down (text upside down).
Rotate part of an image?
Basic tools operate on the entire image. Selective rotation needs an editor with layer support.
Key Takeaway
Image orientation problems are common but easy to fix with the right approach. Use 90-degree rotation for sideways photos, custom rotation with a grid for crooked images, and horizontal or vertical flip for mirrored images. Always work from your original file and apply the transformation exactly once to avoid quality loss.
Final Thoughts
My grandmother now fixes her scanned photos before emailing them to me. I showed her an online rotation tool once over the phone, and she has been sending properly oriented photos ever since. Try rotating and flipping your images online. It takes seconds and makes a world of difference in how your images are perceived.
Why Image Orientation Matters More Than You Think
Image orientation problems affect more people than most realize. Every smartphone user has encountered a photo that displays sideways. Every web developer has debugged an image that flips unexpectedly between desktop and mobile. Every social media manager has uploaded a photo that looked correct in their editing software but appeared rotated after posting. The root cause of nearly all these problems is the inconsistent handling of EXIF orientation metadata across different software applications, operating systems, and display environments. Understanding this root cause is the first step toward permanently fixing orientation issues.
The EXIF orientation tag is a small piece of metadata embedded in every JPEG image captured by modern cameras and smartphones. It contains a value from 1 to 8 that tells display software whether the image needs to be rotated or mirrored to display correctly. The camera sensor physically captures the image in a fixed orientation, but the orientation tag records which way the camera was held when the photo was taken. The problem arises because different software handles this tag differently, or in some cases, ignores it entirely. A photo that looks perfect in Apple Photos may appear rotated in Windows Explorer, sideways in a web browser, and upside down in an email attachment.
EXIF Orientation Values: Value 1 means normal orientation. Value 3 means rotated 180 degrees. Value 6 means rotated 90 degrees clockwise (the most common problem for portrait photos taken on phones). Value 8 means rotated 90 degrees counterclockwise. Values 2, 4, 5, and 7 involve horizontal or vertical mirroring combined with rotation. Only values 1 through 8 are valid, and any image with missing or corrupted EXIF data defaults to normal orientation.
The Difference Between Lossless and Lossy Rotation
There are two fundamentally different approaches to rotating digital images, and the difference has significant implications for image quality. Lossless rotation modifies only the JPEG metadata without re-encoding the actual pixel data. The rotation instruction is stored in the EXIF tag, and the physical image data remains unchanged. This is instantaneous and preserves every pixel perfectly, but it only works for 90-degree increments and relies on the display software correctly interpreting the orientation tag. Many professionals prefer lossless rotation for batch processing large photo libraries because it is fast and preserves original quality.
Lossy rotation, also called pixel-level rotation, physically transforms every pixel in the image to its new position and re-encodes the entire image. This works for any rotation angle, not just 90-degree increments, but it requires re-compressing the image data. Each re-compression cycle introduces a small amount of quality loss in JPEG images. For a single rotation at high quality settings, the loss is imperceptible. However, repeatedly saving and re-editing the same JPEG will progressively degrade quality. This is why professional photographers always work with RAW files or lossless formats and only export to JPEG as the final step.
Best Practice: For simple 90-degree rotation corrections, use lossless rotation to preserve every pixel of quality. For arbitrary angles, fine adjustments, or straightening crooked photos, use the highest quality setting available and minimize the number of edit-save cycles. Penkara's Image Fixer handles orientation corrections intelligently, choosing the optimal approach based on your specific rotation needs.
Common Image Orientation Scenarios and Solutions
Phone Photos Displaying Sideways on Desktop
This is by far the most common orientation problem. Your phone captures the image with a sensor that is always in landscape orientation relative to the device. The orientation tag records which way you held the phone. Desktop software often interprets this tag differently than mobile software, causing the photo to appear rotated. The permanent fix is to use pixel-level rotation that physically reorients the pixels, stripping the EXIF orientation tag and embedding the corrected orientation directly into the image data. Once applied, the image displays correctly on every device and platform permanently.
Scanned Documents at Wrong Angles
Document scanners frequently produce images that require rotation because the original document was placed slightly crooked on the scanner bed. A small rotation correction of 1 to 5 degrees is typically needed to straighten the text. Unlike phone photo rotation which requires 90-degree increments, scanned documents need fine-grained angular correction to produce perfectly aligned text and straight edges. The Penkara Image Fixer provides a precision angle slider for this exact use case.
Flipped Images for Design and Layout
Horizontal flipping reverses an image left to right, creating a mirror image. This is commonly used to change the direction a subject faces, correct reversed text in mirrors or reflections, create symmetrical compositions from asymmetrical source images, and adjust image direction for different cultural reading patterns. Vertical flipping reverses an image top to bottom, which is useful for creating reflections in water effects, correcting upside-down scans, and creating surreal or abstract compositions. Each type of flip serves specific creative purposes that designers should understand.
Batch Orientation Correction for Photo Libraries
When transferring a large photo collection between devices or platforms, many images may have incorrect orientation due to EXIF metadata handling differences. Batch processing tools can analyze the EXIF orientation tag of every image in a folder, apply the correct pixel-level rotation to each, and strip the orientation metadata. This creates a consistently oriented photo library that displays correctly on every device and platform. This is particularly important for photographers migrating their archives between systems or preparing images for client delivery.
Understanding Image Flipping vs Rotation
Many people use the terms flipping and rotation interchangeably, but they produce distinctly different results. Rotation moves the image around a central point, changing its angular orientation while preserving the left-to-right relationship of objects within the image. Flipping creates a mirror image by reversing the image along an axis. A horizontal flip makes left become right and right become left, which is why text appears reversed in a horizontally flipped image. Understanding this distinction is essential for choosing the right transformation for your specific needs.
| Transformation | Description | Common Use Cases | Effect on Text |
|---|---|---|---|
| 90° clockwise | Rotates right edge to bottom | Correct portrait photos from phones | Text rotates 90° |
| 90° counterclockwise | Rotates left edge to bottom | Correct upside-down scans | Text rotates -90° |
| 180° rotation | Flips top to bottom and left to right | Correct upside-down photos | Text is inverted |
| Horizontal flip | Mirrors left to right | Change subject direction, selfie correction | Text is reversed |
| Vertical flip | Mirrors top to bottom | Water reflections, artistic effects | Text is upside down |
| Custom angle | Rotates by any specified degrees | Straighten crooked scans or horizon lines | Text is angled |
Step-by-Step Guide: Using Penkara's Image Orientation Tools
Visit the Image Editor
Navigate to the Image Fixer tool on Penkara. No account creation or software installation is required. The tool works entirely in your browser, and your images are processed securely on our servers with automatic deletion after processing. The interface is designed for both beginners and professionals, with clear buttons for common operations and precision controls for advanced adjustments.
Upload Your Image
Click the upload area and select the image you need to correct. Penkara supports JPEG, PNG, WebP, GIF, BMP, and TIFF formats up to 50 MB. You can also drag and drop images directly onto the upload area for faster workflows. The tool accepts both single images and batch uploads for processing multiple files at once. A progress indicator shows upload status, and the preview loads automatically when the upload completes.
Choose Your Orientation Adjustment
Select the appropriate rotation or flip option. For standard corrections, use the 90-degree clockwise or counterclockwise buttons. For mirroring, use the horizontal or vertical flip buttons. For precise straightening, use the angle slider to adjust by fractions of a degree. A live preview shows the result of each adjustment in real time, so you can see exactly what the final image will look like before you download it. The preview updates instantly as you make adjustments.
Preview and Download
Review the corrected image in the preview panel. The tool shows a side-by-side comparison when helpful, especially for subtle straightening adjustments. When you are satisfied with the result, click the download button. The corrected image is saved with the orientation physically applied to the pixel data, ensuring it displays correctly on every device and platform without relying on EXIF metadata interpretation. The processed image is available for download through a secure temporary link.
Stripping EXIF Orientation Metadata
One of the most effective ways to permanently fix orientation problems is to strip the EXIF orientation tag from your images entirely and apply the correct rotation directly to the pixel data. This ensures that the image displays correctly everywhere, regardless of how different software handles orientation metadata. Penkara's EXIF Remover can strip all metadata including orientation tags from your images, and combined with the Image Fixer, you can apply permanent pixel-level corrections that are immune to metadata interpretation differences. This combination is the gold standard for orientation correction.
Important Warning: Never rely solely on EXIF orientation tags for critical image display scenarios. Always apply pixel-level rotation for production images that need to display correctly across different platforms, especially for e-commerce product photos, social media content, and website images. EXIF-dependent orientation is the leading cause of seemingly random image rotation problems in web applications and content management systems.
Image Orientation in Web Development
For web developers, image orientation presents unique challenges. CSS provides the image-orientation property that can correct orientation issues at the rendering level, but browser support and behavior vary. The most reliable approach is to ensure that all uploaded images have their orientation applied at the pixel level before they are served to visitors. On the server side, libraries like Intervention Image in PHP can detect EXIF orientation and apply automatic corrections during upload processing. This server-side approach ensures that every image stored on your server is already correctly oriented, regardless of how different client applications might interpret the EXIF data.
For WordPress sites, plugins like Imsanity and Smush include automatic orientation correction that reads the EXIF orientation tag and applies pixel-level rotation during image upload. For custom PHP applications, the GD library and Imagick extension both provide methods for detecting and applying EXIF orientation corrections. The key is to make orientation correction an automatic part of your image upload pipeline rather than relying on users to correct their images before uploading. This eliminates orientation problems at the source and ensures a consistent experience across your entire application.
Best Practices for Image Orientation Management
Developing a systematic approach to image orientation management will save you countless hours of troubleshooting. Always apply pixel-level rotation to images that will be published on websites, shared across platforms, or used in professional contexts. Keep original files with EXIF orientation intact as masters, and create corrected copies for distribution. When building applications that accept user uploads, implement automatic EXIF orientation detection and correction as part of the upload processing pipeline. Educate users about common orientation issues and provide clear guidance on how to correct them using your tools.
Key Takeaway
Image orientation problems are pervasive because the industry-standard solution of EXIF metadata tags is inconsistently implemented across different software. The only reliable fix is to apply pixel-level rotation that physically reorients the image data, making the correction permanent and display-independent. Whether you are fixing a single family photo or building an image processing pipeline for a web application, understanding the difference between metadata rotation and pixel rotation is essential for achieving consistently correct image orientation across all platforms.
Frequently Asked Questions
Why do my iPhone photos appear sideways on my computer?
This happens because the iPhone embeds orientation information in the EXIF metadata rather than physically rotating the pixel data. Different operating systems and software interpret this metadata differently. Windows Photo Viewer, macOS Preview, web browsers, and social media platforms may each display the same image with different orientations. The fix is to apply pixel-level rotation that physically reorients the image and strips the EXIF orientation tag, making the correction permanent across all platforms.
Does rotating an image reduce its quality?
Lossless rotation at 90-degree increments does not reduce quality because the JPEG data is not re-encoded. Custom angle rotation and fine straightening require re-encoding the image, which introduces a small amount of generation loss. At high quality settings, this loss is imperceptible. To minimize quality degradation, always start from the original image rather than a previously edited copy, and use the highest available quality setting. For maximum preservation, convert to a lossless format like PNG or TIFF before editing, then convert back to JPEG for final delivery.
What is the difference between rotating and flipping an image?
Rotation moves the image around a central axis, changing its angular orientation. A 90-degree rotation makes a landscape image portrait and vice versa. Flipping creates a mirror image by reversing pixels along an axis. Horizontal flipping swaps left and right, while vertical flipping swaps top and bottom. The key difference is that rotation preserves the relative left-right order of objects, while flipping reverses it. This distinction matters when text or directional elements are present in the image.
Can I rotate multiple images at once?
Yes, Penkara's image processing tools support batch rotation. You can upload multiple images and apply the same rotation or flip operation to all of them simultaneously. This is particularly useful for correcting a batch of photos from a single photoshoot where all images were captured in the same orientation, or for standardizing the orientation of a large image library before uploading to a website or content management system. The batch process maintains the same quality settings across all images for consistent results.
How do I straighten a crooked scanned document?
Use the custom angle rotation feature to make fine adjustments. Upload the scanned document, then use the angle slider to rotate by small increments, typically 1 to 5 degrees in either direction. The live preview shows the document edges relative to a grid overlay, helping you align text perfectly horizontal. For heavily skewed documents, you may need to combine rotation with cropping to remove white triangular edges that appear after rotation. Most documents can be straightened in under 30 seconds using this approach.
What is the best image format for preserving quality after rotation?
PNG and TIFF formats use lossless compression and retain full quality through multiple edit cycles. If you need to perform multiple edits including rotation, cropping, and color adjustments, work in a lossless format first and convert to JPEG only for final delivery. WebP offers a good compromise with efficient compression that supports both lossy and lossless modes, giving you flexibility for web delivery without excessive quality loss. The Penkara Image Converter supports conversions between all these formats.
Does the Penkara image rotation tool strip EXIF data?
The Image Fixer tool applies pixel-level rotation that makes the orientation correction permanent. It strips the EXIF orientation tag because the correction is now embedded in the pixel data itself. Other EXIF metadata like camera information, date stamps, and GPS coordinates are preserved unless you specifically choose to remove them using the EXIF Remover tool. This gives you full control over which metadata to keep and which to discard.
How do I prevent orientation problems when sharing photos?
The most reliable way to prevent orientation problems is to apply pixel-level rotation to your photos before sharing them. This strips the EXIF orientation tag and makes the correction permanent. Most social media platforms and messaging apps will reorient images based on their own interpretation of the EXIF data, which may differ from how the image looks on your device. By applying pixel-level correction before sharing, you ensure that the image appears exactly as intended on every platform.
Image Orientation for Social Media
Each social media platform has specific image orientation requirements that affect how your content displays. Instagram traditionally used square images but now supports portrait and landscape orientations with specific aspect ratio recommendations. Twitter displays images inline at a 16:9 ratio but crops them differently in timelines versus expanded views. LinkedIn prefers horizontal images at 1200x627 pixels for optimal display. Facebook's algorithm prioritizes images that fill the entire preview area. Understanding these platform-specific requirements helps you prepare your images correctly before posting, avoiding awkward cropping and orientation problems that reduce engagement.
Batch Processing Large Photo Libraries
When dealing with thousands of photos that need orientation correction, manual processing is impractical. Batch processing tools can analyze EXIF orientation data from every image in a folder, apply the appropriate pixel-level rotation, and strip the orientation metadata in a single operation. The Penkara Image Fixer supports batch uploads for efficient processing of multiple images. Before batch processing, always test your settings on a small sample to verify the results meet your quality expectations and orientation requirements.
Preserving Image Quality Through Multiple Edits
Images that require multiple editing operations face cumulative quality loss from repeated compression cycles. To preserve maximum quality, plan your editing workflow to minimize the number of save cycles. Perform all edits including rotation, cropping, color adjustment, and resizing in a single session before saving the final result. Start with the highest quality source available, apply all transformations in one pass, and save only once at the end of the process. This approach limits generation loss to a single compression cycle regardless of how many edits you apply.
Image Orientation in Print vs Digital
Orientation requirements differ significantly between print and digital media. Print documents have fixed physical dimensions where orientation is determined at the layout stage. Digital images need to adapt to different screen sizes, orientations, and viewing contexts. A single digital image might need to work as a full-width desktop banner, a mobile portrait thumbnail, and a social media square crop. Understanding these different use cases helps you create images that work effectively across all their intended contexts.
Camera Orientation Settings to Prevent Problems
Many orientation problems can be prevented at the capture stage by adjusting your camera settings. Most smartphones have a setting to lock screen rotation during capture, preventing accidental upside-down photos. Some cameras offer automatic orientation correction that applies pixel-level rotation at capture time rather than relying on EXIF metadata. Professional photographers often disable EXIF orientation writing entirely and manage orientation manually for complete control. Familiarizing yourself with your camera's orientation settings helps you prevent problems before they occur.
Orientation Metadata in Different File Formats
EXIF orientation metadata is primarily a JPEG feature. PNG, WebP, and other modern formats do not have standardized orientation metadata, which means any orientation issues in these formats are pixel-level problems that require manual correction. When converting between formats, EXIF orientation should always be applied at the pixel level to ensure consistent display regardless of the output format. The Penkara Image Converter handles this conversion correctly, applying orientation before format conversion for consistent results.
Key Takeaway
Image orientation is a deceptively complex topic that affects virtually everyone who works with digital images. The combination of inconsistent EXIF metadata handling, varying platform requirements, and different format capabilities creates numerous opportunities for images to display incorrectly. The solution is a systematic approach that applies pixel-level orientation correction early in your workflow, strips unreliable EXIF orientation metadata, and produces images that display correctly on every platform and device. With the right tools and understanding, you can eliminate orientation problems from your workflow permanently.
Using Image Metadata for Orientation Management
Beyond the orientation tag, image metadata contains valuable information for managing your photo library. EXIF data includes camera model, lens information, exposure settings, GPS coordinates, and date stamps. XMP and IPTC metadata include copyright information, descriptions, and keywords. When correcting orientation, consider whether you want to preserve this other metadata or strip it along with the orientation tag. For personal photo libraries, preserving metadata helps with organization and recall. For published web images, stripping metadata reduces file size and protects your privacy. Penkara's Image Metadata Viewer helps you see exactly what metadata your images contain before deciding what to keep or remove.
Orientation Correction for Batch Photo Processing
When processing large batches of photos from a wedding, event, or photoshoot, consistent orientation correction is essential for a professional result. Create a standardized workflow that includes automatic EXIF orientation detection, pixel-level correction, metadata stripping or preservation based on your requirements, and consistent output formatting. Tools that support batch processing with preview capabilities let you verify the results before committing to the full batch. This workflow ensures that every photo in your collection displays correctly regardless of which device or platform your clients use to view them.
Mobile-First Orientation Strategies
With mobile devices accounting for over 60 percent of web traffic, designing for mobile-first orientation is essential. Mobile users frequently encounter orientation problems because they switch between portrait and landscape modes, view content on different devices, and share photos across platforms. Implementing responsive design that handles image orientation gracefully, using CSS object-fit and object-position properties to control how images display in different containers, and ensuring that your image processing pipeline handles EXIF orientation correctly for all upload sources are key strategies for mobile-first orientation management.
Advanced Image Rotation Techniques
Beyond basic rotation and flipping, several advanced techniques give you greater control over image orientation. Content-aware rotation analyzes the image content to determine the correct orientation automatically, using machine learning to detect horizons, faces, text, and other visual cues that indicate the proper orientation. Perspective correction adjusts images taken at an angle to create the appearance of being photographed straight on, which is particularly useful for photographs of documents, whiteboards, and buildings. Keystone correction fixes the trapezoidal distortion that occurs when photographing rectangular objects at an angle, commonly needed for architectural photography and document scans. These advanced techniques require more sophisticated tools but produce superior results for complex orientation problems.
When combining multiple orientation adjustments, the order of operations matters for preserving image quality. Apply any cropping or resizing operations first, as they determine the image dimensions that subsequent operations will work with. Apply rotation and perspective corrections next, as these transform the pixel grid and affect how subsequent adjustments will be applied. Apply color and exposure adjustments last, as these operate on individual pixels and are not affected by geometric transformations. Following this order ensures that each operation works with the most appropriate image state and minimizes the number of compression cycles required.
Image Orientation in Different Industries
Image orientation requirements vary significantly across industries. E-commerce platforms need product photos that display consistently from multiple angles, with standardized orientation for catalog pages, zoom views, and customer reviews. Real estate photography has specific orientation standards for interior and exterior shots, with wide-angle interior shots requiring careful attention to vertical lines and perspective. Medical imaging has strict orientation standards where incorrect orientation could lead to misdiagnosis. Legal document scanning requires perfectly straight, properly oriented documents for evidentiary use. Aerial photography from drones needs orientation correction based on flight direction and camera angle. Understanding your industry's specific orientation requirements helps you implement the right correction workflow for your use case.
Image Orientation in Mobile Applications
Mobile applications face unique image orientation challenges because users capture photos in every possible orientation and expect the app to handle them correctly. Implementing automatic EXIF orientation detection and correction in your mobile app ensures that user-uploaded photos display correctly regardless of how they were captured. The iOS image picker provides orientation-corrected images automatically, but Android's behavior varies across devices and API versions. Server-side fallback processing that checks and corrects orientation provides an additional safety net for images that were not corrected on the client side. Testing with images captured in all eight EXIF orientation states ensures your application handles every possible orientation correctly.
Lossless JPEG Rotation Tools and Techniques
Several specialized tools offer lossless JPEG rotation for 90-degree increments without any quality degradation. jpegtran, part of the Independent JPEG Group's software library, performs lossless rotation on the command line. The libjpeg-turbo library provides fast, lossless rotation for applications. Many image editing applications including IrfanView and FastStone Image Viewer offer lossless JPEG rotation in their graphical interfaces. Penkara's online tools use lossless rotation when applicable and fall back to high-quality lossy rotation for arbitrary angles. Understanding when lossless rotation is available and how to use it helps you preserve maximum quality in your orientation correction workflow.
Creating Orientation-Aware Web Applications
Building web applications that handle image orientation gracefully requires attention to both client-side and server-side processing. On the client side, the HTML5 File API provides access to file metadata including EXIF orientation. JavaScript libraries like exif-js can read orientation data before upload, allowing you to preview images in their correct orientation. The CSS image-orientation property can correct display without modifying the image file. On the server side, image processing libraries should detect and apply EXIF orientation automatically during upload processing. This combination of client-side display correction and server-side permanent correction ensures that images are always displayed correctly while ultimately storing properly oriented files on your server.
Image Orientation in Graphic Design Software
Professional graphic design software offers varying levels of orientation control that affect your workflow. Adobe Photoshop provides comprehensive rotation capabilities including arbitrary angle rotation, canvas rotation for painting at natural angles, and content-aware fill for transparent areas created by rotation. Adobe Illustrator handles orientation differently because it works with vector paths rather than pixels, allowing lossless rotation at any angle. GIMP, the open-source alternative, offers comparable rotation features to Photoshop with a different interface. Affinity Photo provides professional-grade rotation tools with a focus on performance and precision. Understanding the orientation capabilities of your preferred design tools helps you choose the most efficient workflow for each project.
When working with rotated images in design software, pay attention to the canvas behavior. Some applications expand the canvas to accommodate rotated images, creating transparent areas around the rotated content. Others crop the rotated image to fit the original canvas dimensions, potentially cutting off important content. Most professional applications let you choose which behavior you prefer. For images that require precise placement after rotation, consider using smart guides and alignment tools that help you position rotated elements accurately within your composition. These workflow considerations make the difference between a smooth editing experience and a frustrating one.
Preventing Orientation Problems Through Education
Many orientation problems can be prevented by educating users about how their devices handle image orientation. Smartphone users should understand that rotating their phone during capture affects the EXIF orientation tag, and that some apps and platforms will display the image differently than it appeared on their phone screen. Camera users should understand the difference between optical viewfinders and electronic displays, and how their camera's auto-rotate setting affects captured images. Website administrators should understand that relying on EXIF orientation for display is unreliable and that server-side pixel-level rotation is necessary for consistent results. A little education goes a long way toward preventing the most common orientation problems before they occur.
Testing Image Orientation Across Platforms
Before publishing images that will be viewed across multiple platforms, test their orientation display in each environment. Upload test images to your website and verify they display correctly in Chrome, Firefox, Safari, and Edge on both desktop and mobile. Share test images through email and verify they display correctly in Gmail, Outlook, and Apple Mail. Post test images to your social media accounts and verify the display in each platform's feed, expanded view, and mobile app. This comprehensive testing ensures that your images display correctly for every member of your audience, regardless of which platform or device they use.
Abo Gamil
Author